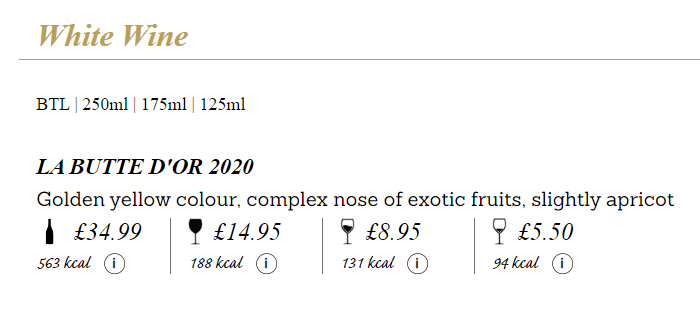
Display multiple portion sizes per item on your menu and configure how these are shown on web menus.
This is particularly useful for visually displaying drink sizes on offer.
Uploading Icons For Use
First you must upload the icons for use and attach these to the item. This can be done via menu item page.
- Find the item you wish to upload icons for via ‘Menu Items’
- Open the item and click ‘Edit Menu Item’
- Go to the ‘Retail’ tab (1) and click the cog icon (2) for each size
- Go to the ‘Icon tab’ (3) and upload new icon (4):
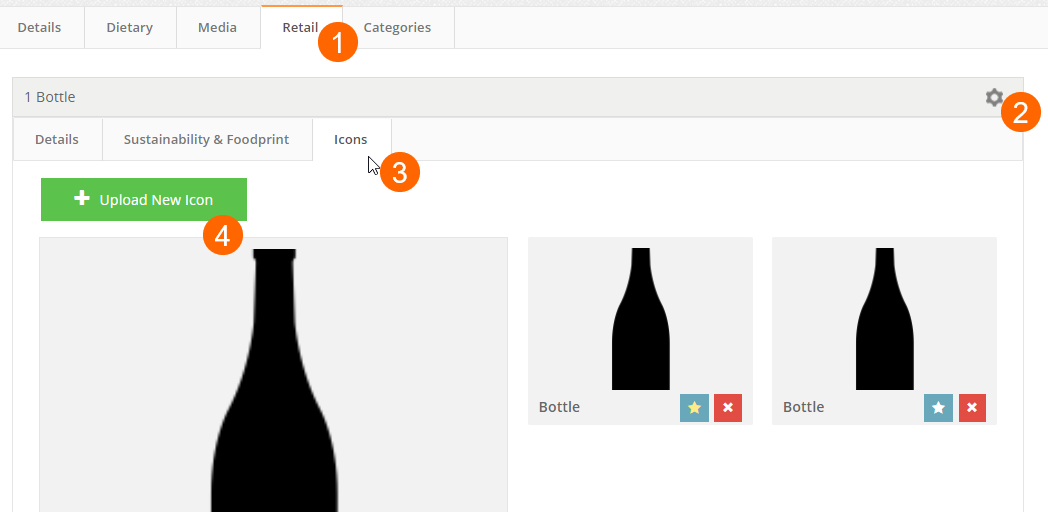
- This will open the Media Manager where you can upload icons for use. Click ‘Add New Image’ to upload
- You can then select the relevant icon back in the item’s retail size settings by clicking the ‘star’ to favourite
- This must be repeated for all retail sizes for the item.
Enabling retail sizes on your menu
- Search for the Web Menu Template Theme you wish to edit
- Click ‘Edit Unit Template’
- Click the ‘Settings’ tab and go to the ‘Template Level Display Settings’ section
- Select display preference for retail sizes beside ‘Retail Size Style’:
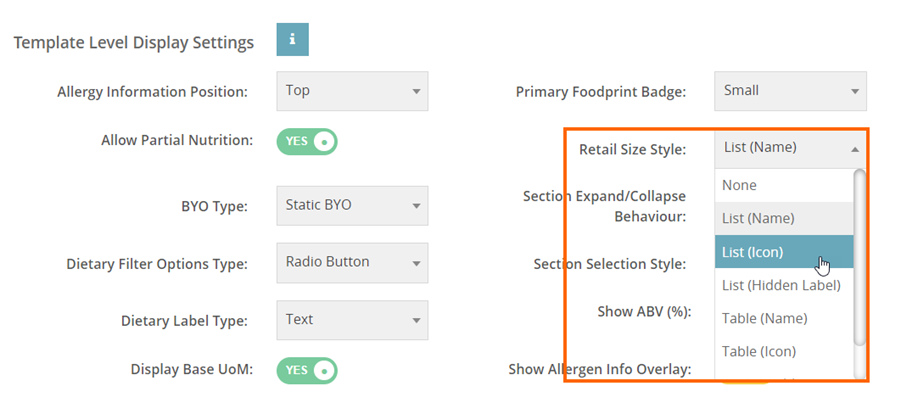
Choose between naming sizes, showing an icon for each size or using a hidden label. These can be presented in a list of table view on the menu. You can also choose ‘none’ to switch retail sizes off.