Once your menus are formatted and ready to use, you can publish them to various digital outputs in Ten Kites, which could be any of the following: –
- Menus to Web
- Allergens on Tablets
- Digital Recipe Cards
- APIs
- Digital Display
- POS Systems
- Online Ordering
- Digital Display
- Social Media
How to Publish Menus
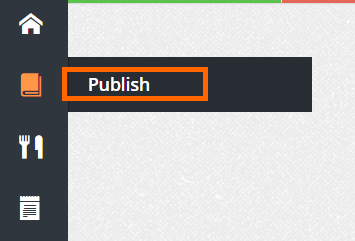
- From the home page navigation bar on the left side of your screen, select the Publish ‘book’ icon
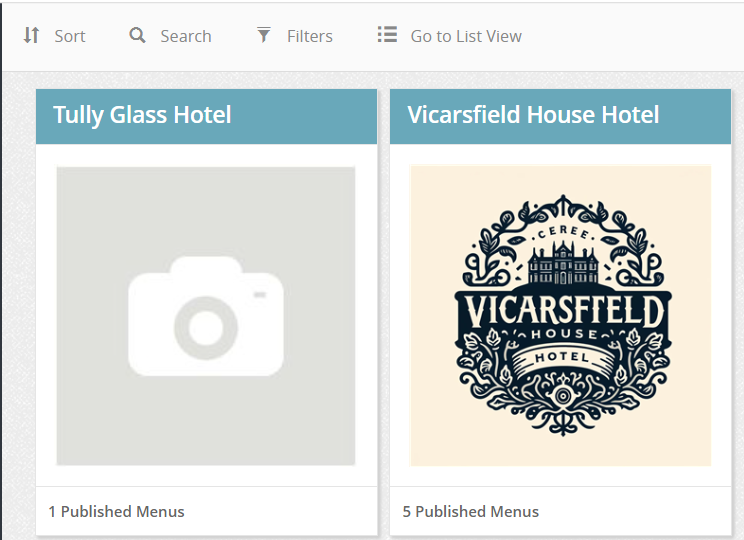
- The home page of the Publishing module displays all your brand units and a summary of how many menus have been published per unit. Select the brand unit you wish to publish the menu(s) to.
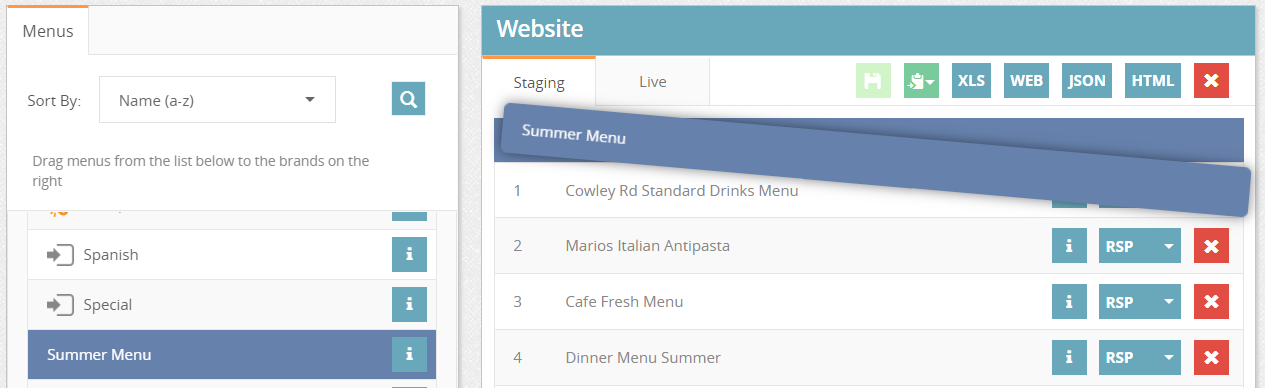
- Available menus will be visible on the left hand side of your screen. You can search for a particular menu using the magnifying glass and sort by name or creation date.
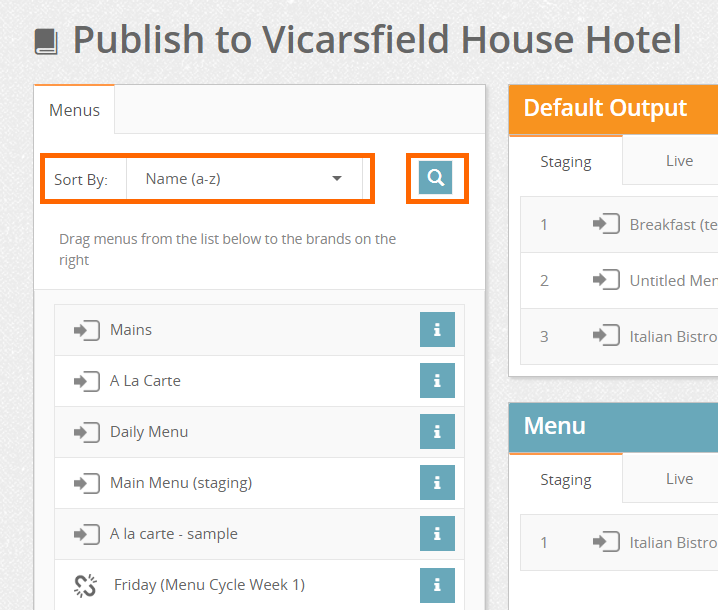
- On the right-hand side you will see the output types that have been created for the brand unit.
Menus are published to each output as required and can be published to one of two places – staging or live.
- Staging: Publishing menus to a staging environment allows you to check format, content etc. prior to publishing to live
- Live: Publishing to live will make your menu immediately available to your intended users/customers
To add a new menu to the output search for the menu on the left of the screen and drag across to the right output and drop in the position required.
The position you drop the menu here will determine the position the menu appears on the web output, e.g.- from a drop down list of menus on your website, ‘Summer Menu’ will now appear at the top, Cowley Rd Standard Drinks Menu second, etc.
To reposition the published menus, you can drag and drop them within the staging or live list as required. After any changes are made, save.
There may be an ! symbol next to the menu itself, which means there is some missing information that is important to that output that isn’t populated. Clicking on the symbol will tell you what is missing.

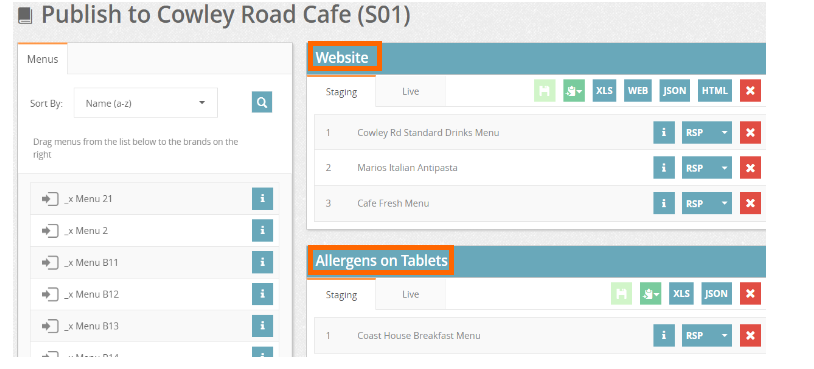
Menu Staging
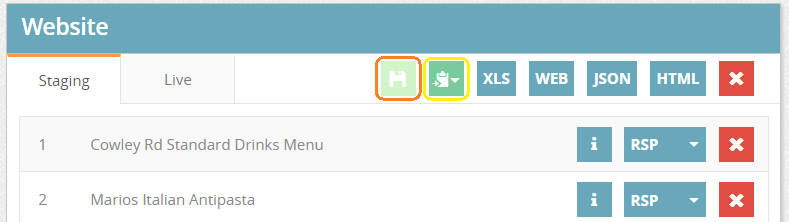
The buttons/options within ‘Staging’ are explained below:
- Save (highlighted in orange)
- Copy (highlighted in yellow): Menus in ‘Staging’ can be copied to live either immediately or scheduled for a date and time of your choosing e.g. for the launch of a new menu.
- XLS: Menu content (including allergen and nutritional info) can be exported to excel
- WEB: Clicking WEB shows how the menus will be displayed in the chosen web output- e.g. to the website
- JSON: The API output
- HTML: Static HTML POS transfer file
- ‘X’: Remove all menus using the ‘X’ on the main menu row or an individual menu using the ‘X’ on each menu row
- RSP: Select the price banding per menu if price bands are used (optional)
- ‘i’: Menu-specific information such as created/updated date and menu items displayed
Live Menus
- Within ‘Live’ all settings are the same as above except for two, highlighted below
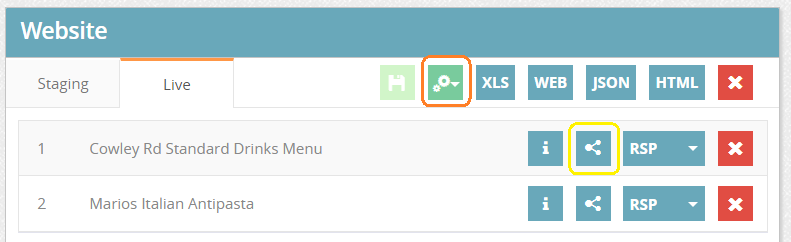
- Manual Data Refresh (orange): set to ‘No’ as default as daily updates for menus/menu items received from your source recipe management system update the output automatically. Set this to ‘Yes’ if there’s a workflow in place to validate the menu changes before they are updated on the live output
- Share (yellow): Allows you to share each menu with your facebook or X followers.