The Nutritics Print Driver has been designed to work in conjunction with Nutritics and the Nutritics Label Magic solution. The application is designed to sit silently on your android device and handle all of your printing needs.
The print application allows you to operate a fully mobile, end to end print solution, all the way from Nutritics, through Label Magic and finally printing from your Nutritics approved mobile printer. Once installed and configured, the application will inherit any settings needed from the Nutritics system to facilitate the print job.
Skip ahead to..
- Device Requirements
- Installing the App
- Connecting a Printer via Bluetooth
- Connecting a Printer via WiFi
- Connecting to an Android device
- Connecting to Multiple Printers
- Setting up the Driver for Printing
Device Requirements
The Nutritics Print Driver application has been designed to operate with Android devices and is available via the Google Play Store. The requirements to run the application include:
- Android 6.0 and up
- Screen size of 6 inches and up
The device must support Bluetooth Classic (BR/EDR) for printing. Bluetooth Low Energy is not supported (BLE Only or BLTE).
Printer Connectivity
The application shall facilitate a connection into the following printers:
- Brother TD2120
- Brother TD2130
- Brother TD4550DNWB
- Brother TD4510D
- Brother TD4510TN
- Brother TD4750TNWB
- Zebra ZD420
- Zebra ZD421
- Zebra ZD421t
- Zebra ZD620
- Zebra ZD621
Installation
Firstly, install the Nutritics Print Driver application. The application is available from the Google Play Store.
The application can be found by searching for ‘Nutritics Print Driver’ or using the link below:
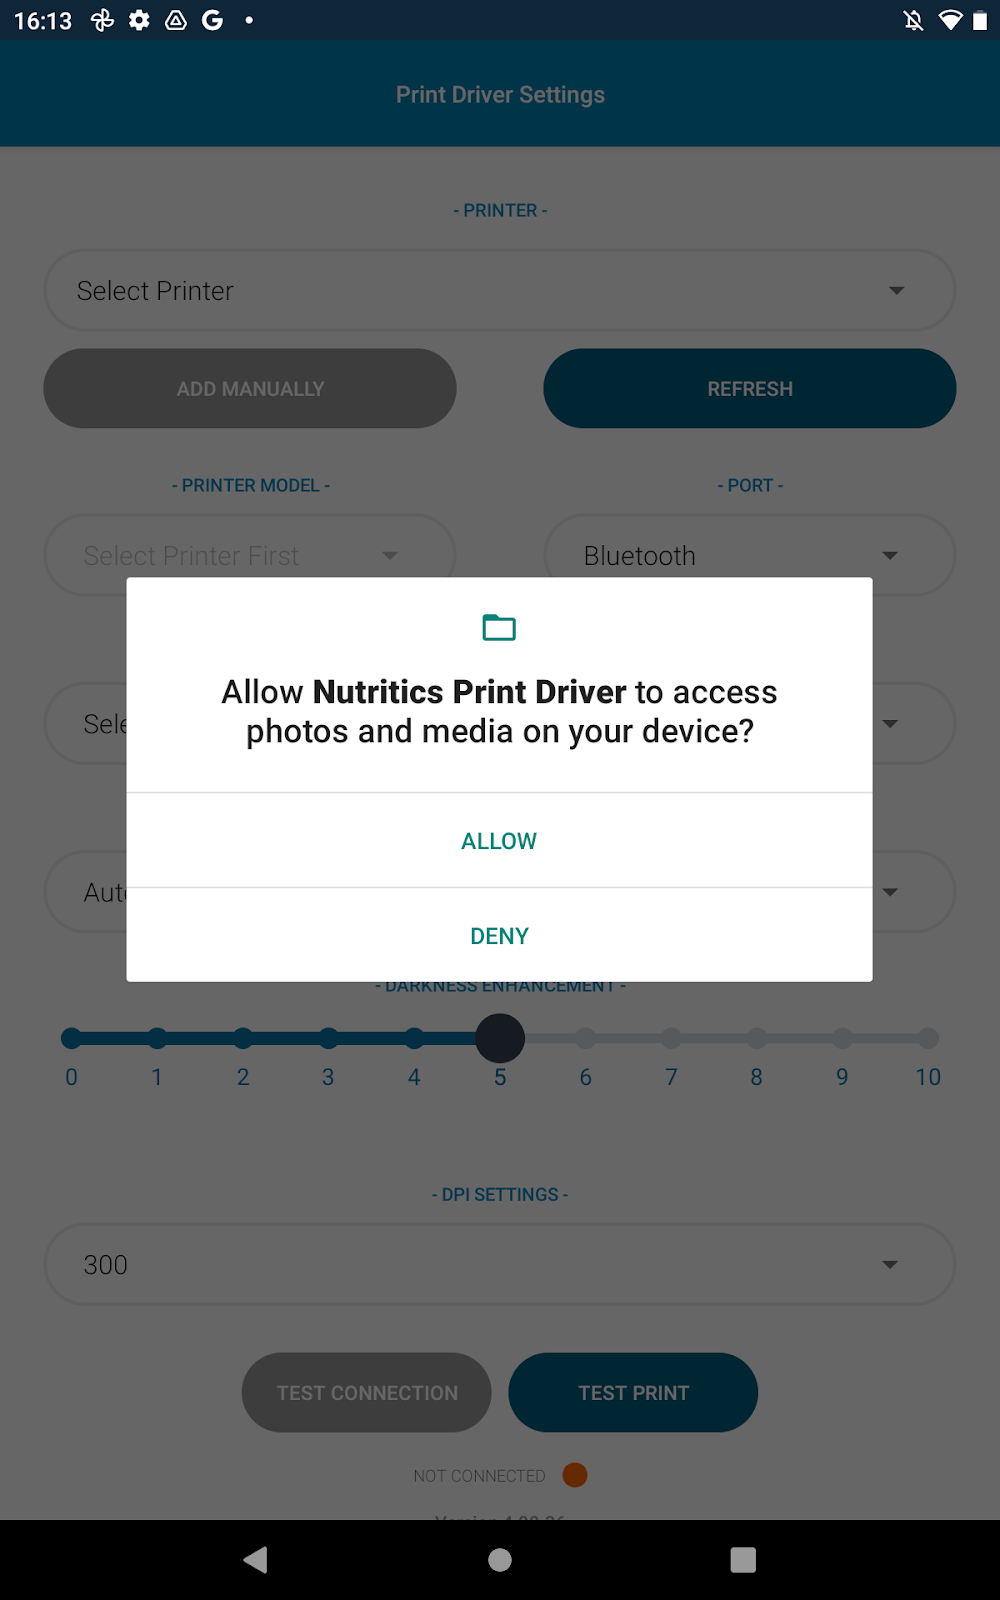
Set Up Permissions
Once you have installed the application, open the application and accept all necessary permissions:

Connect To A Printer via Bluetooth
Automatic Connection
To connect your printer to the Nutritics Print Driver application via Bluetooth, please follow the steps below:
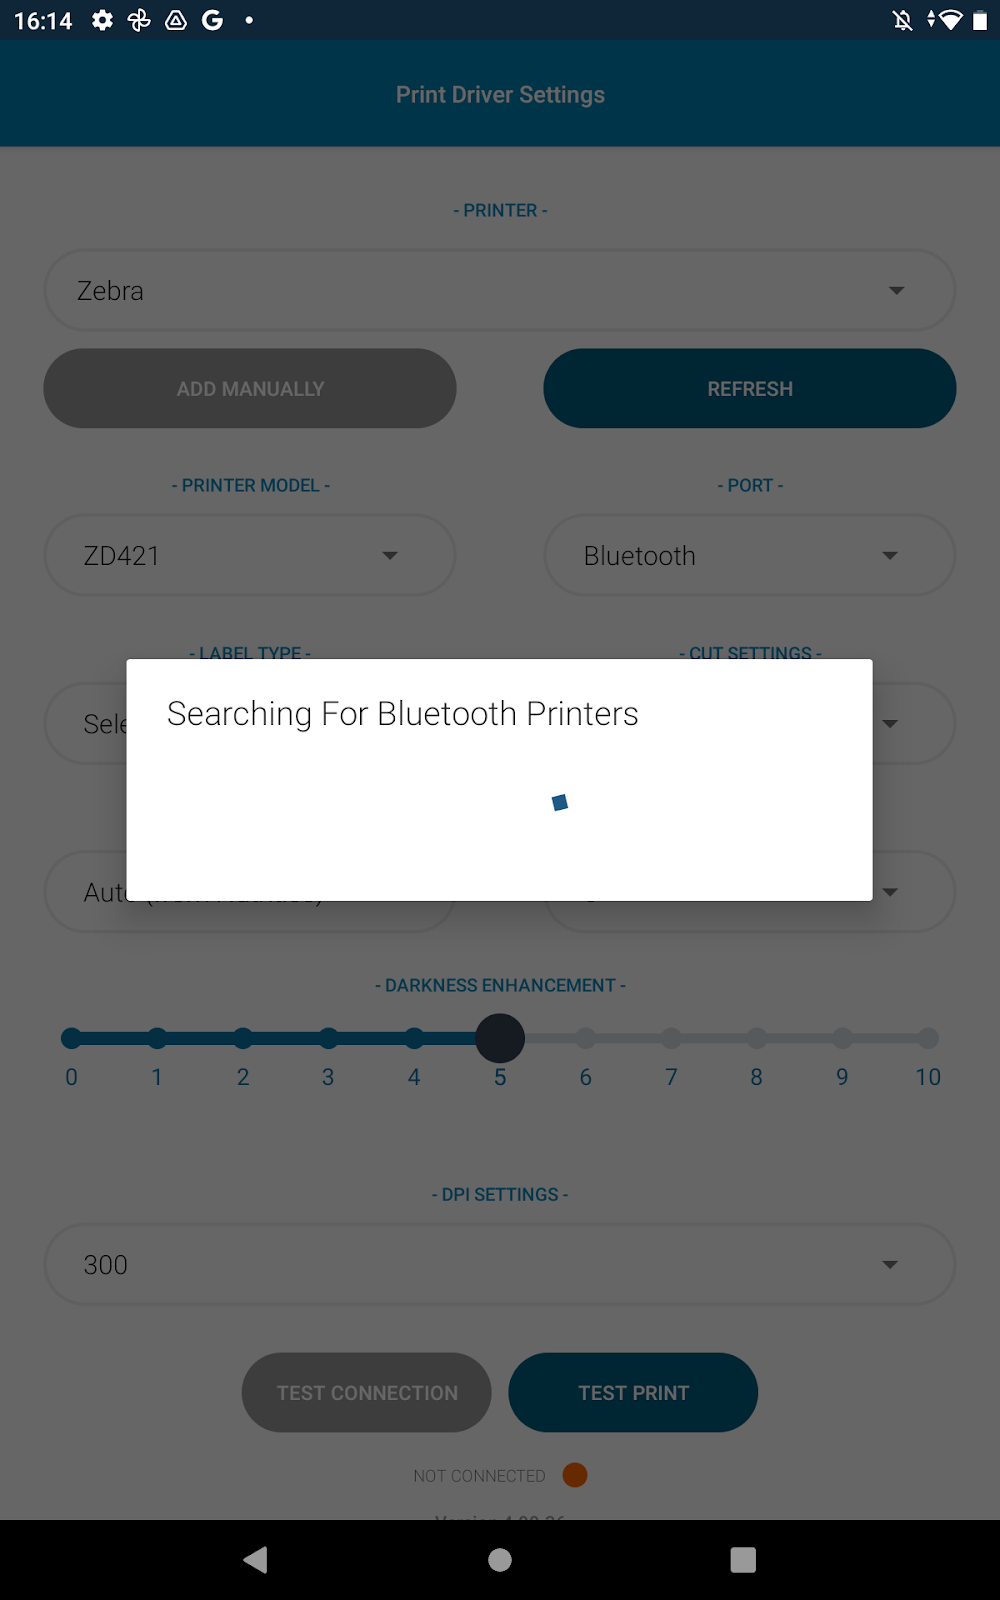
- Put your printer into pairing mode, so that it can be discovered
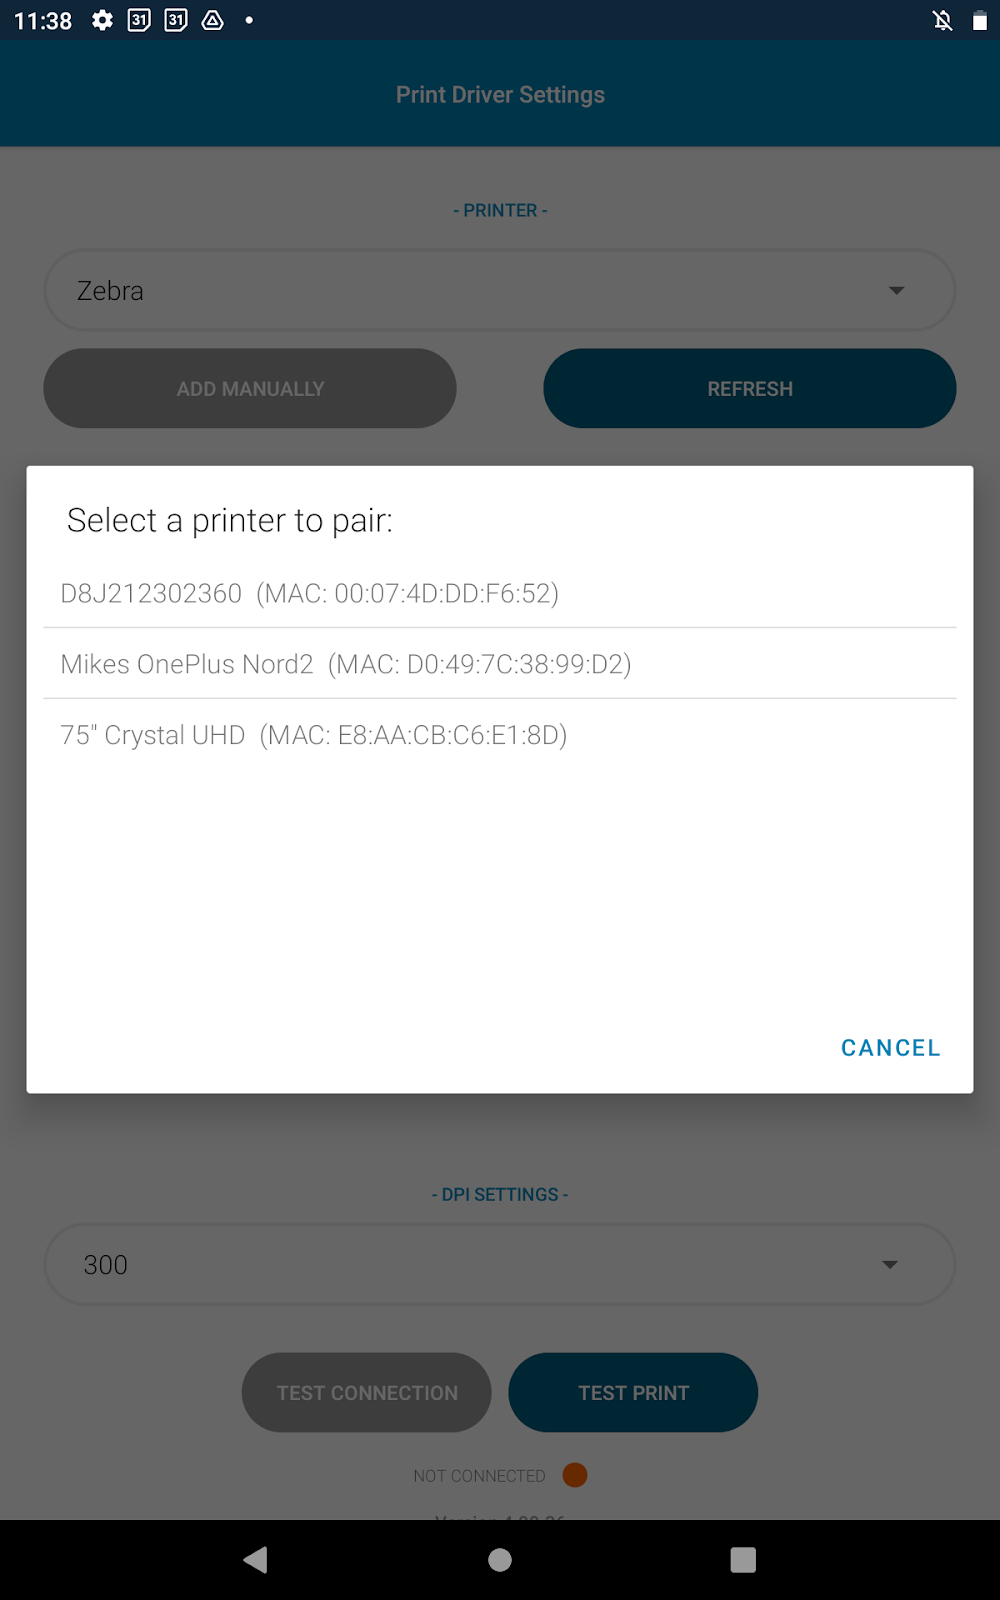
- In the Nutritics Print Driver, select the relevant printer make and model. The print app shall then search for available devices nearby (image 1 below)
- Once discovered, select the printer that you are attempting to connect to (image 2 below). To check that it is the correct device, confirm the serial number and MAC Address of the printer
- When prompted to do so, ensure that the code displayed on screen matches the code printed/displayed by your printer and select ‘pair’ (see image 3 below):
Manual Connection
If you are unable to connect automatically, you can use the ‘Add Manually’ button which will allow you to enter the MAC address of the printer that you would like to connect to:
Confirmation of Connection
Once your printer is connected, we advise using the ‘test connection’ option at the bottom of the application screen to ensure that the connection is active.
Connect to a Printer via WiFi
Firstly, ensure that your printer is connected to a WiFi connection – this should be the same connection that your Android device is connected to
Depending on the device, there are different ways to connect to WiFi. However, please see the below guides, which may be of assistance:
- Zebra – can be configured using the Printer Setup Utility app on this LINK
- Brother – can be connected using the buttons and screen on the printer. Alternatively, it can be connected by configuring the WiFi settings via USB via this LINK

Connect Your Printer to an Android Device
Within the Nutritics Print Driver, please follow the steps below:
- Select ‘WiFi’ in the ‘Port’ setting
- Select the printer make and model
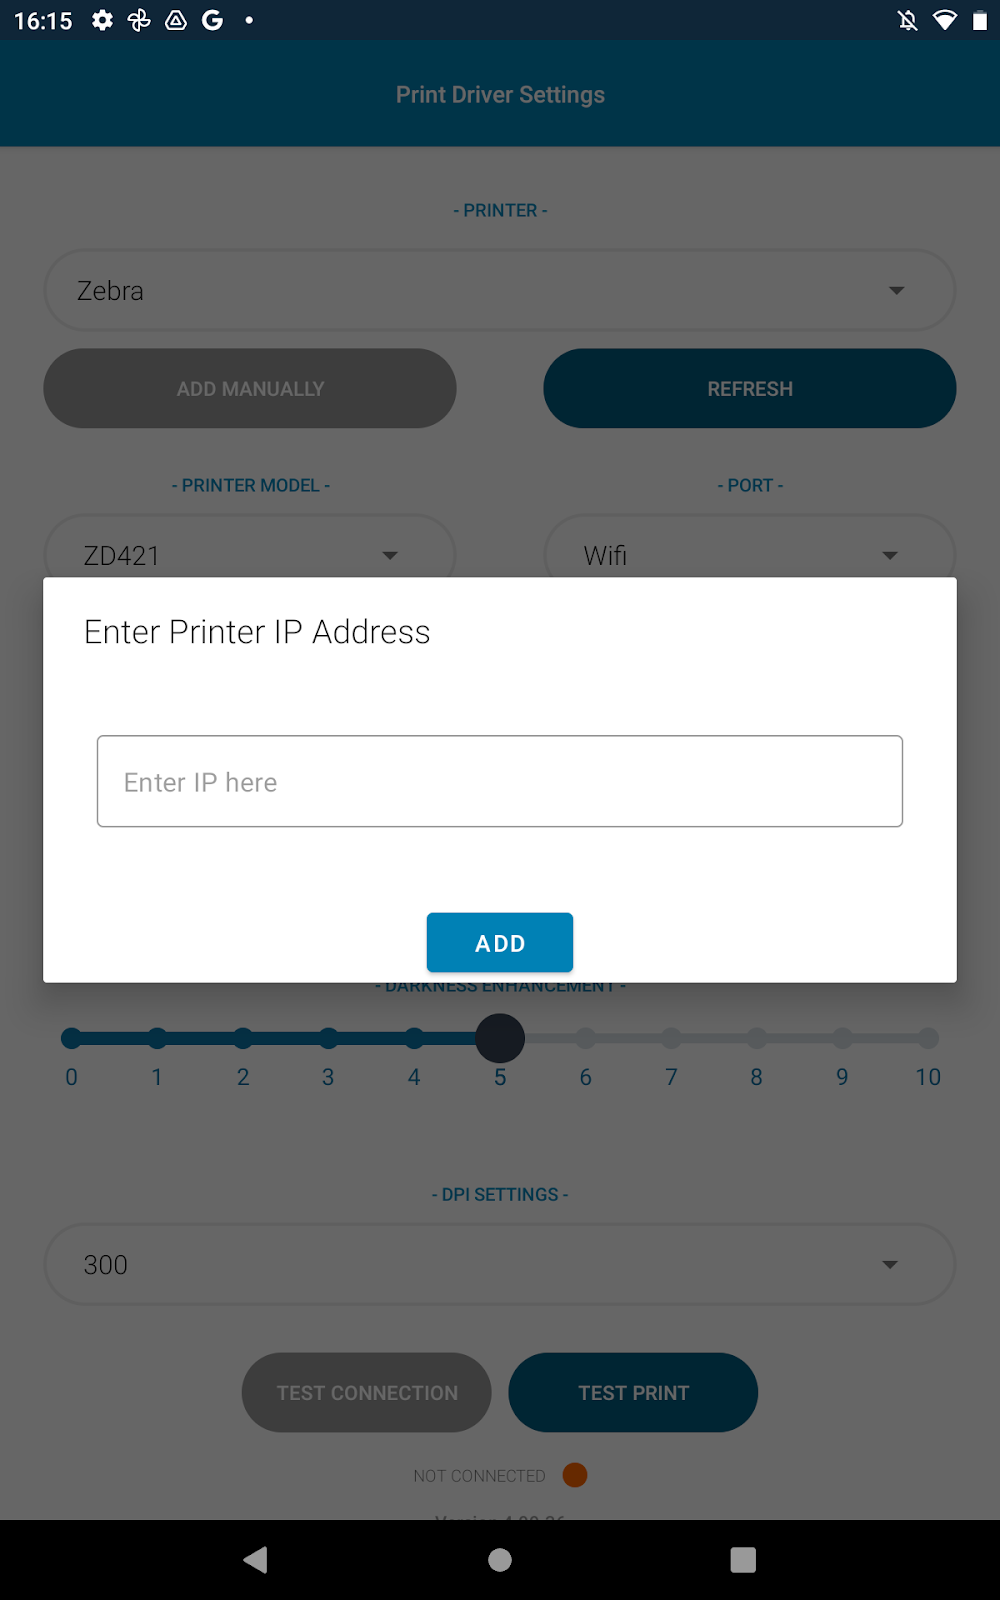
- When prompted, enter the IP Address of the printer. If you do not receive a prompt, select the ‘Add Manually’ button
- Once you have entered the IP Address, select the ‘Add’ button

Setting up the Driver for Printing Labels
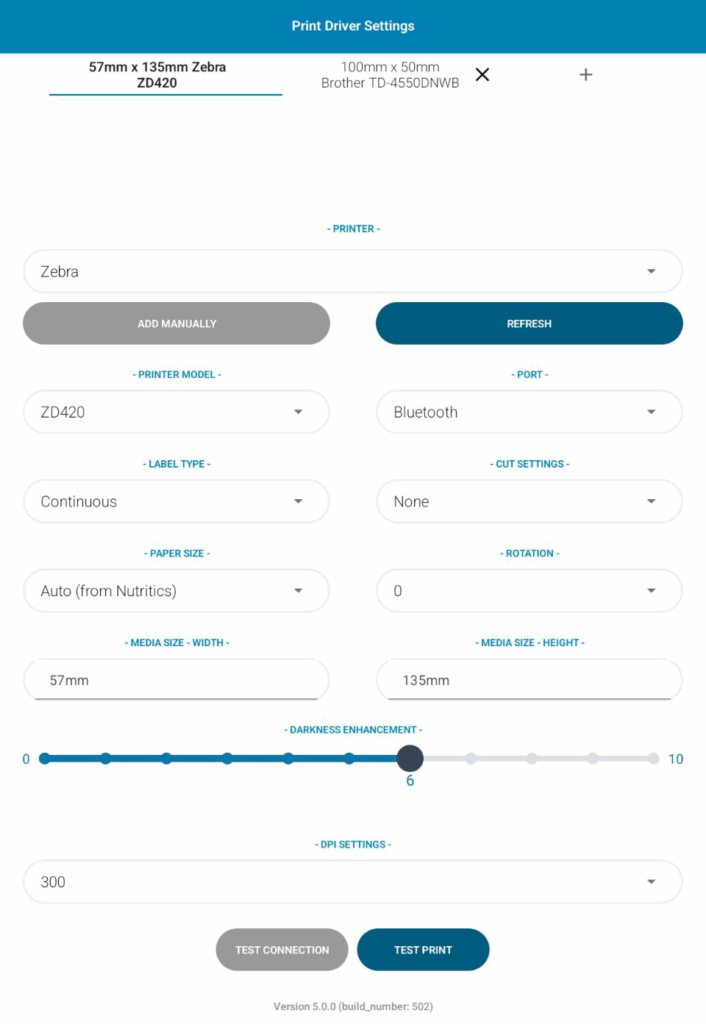
Once your application is installed and the printer connected, you can apply the necessary settings on the application:
Printer Make
Available options:
- Brother
- Zebra
Please select the model number which corresponds to your printer.
Printer Model
The available options depend on which ‘printer make’ that was selected. Please select the model number which corresponds to your printer.
Port
Available options:
- Bluetooth
- WiFi
Please select the option which corresponds to your chosen communication method. The default option is bluetooth.
Label Type
Available options:
- Die-Cut – these are pre cut labels, where there is a small gap between each label on the roll
- Continuous – this is a continuous roll of label and requires a cutter
- Transmissive – the label gaps are denoted by small black marks
Please select the option which corresponds to your chosen label roll.
Cut Settings
Available options:
- None – used when using die-cut labels
- Dynamic – used where a cutter is attached to the printer and ‘continuous’ labels are being used
Please select the option which corresponds to your chosen cut settings. The default is ‘none’.
Paper Size
Available options:
- Auto – the print driver matches the label size that is sent from Nutritics
- A4
- A3
- Letter
- Label
Please select the option which corresponds to your chosen label size. The default is ‘Auto’ and we recommend using this setting.
Rotation
Available options:
- 0
- 90
- 180
- 270
This allows you to add a standard rotation to your labels before printing.
Please select the option which corresponds to your chosen rotation. The default is ‘0’.
Media Size (Width and Height)
Enter the width and height of the labels used by this printer in the appropriate fields. Only input if you are connecting multiple printers.
This information ensures the system can identify which printer should handle each label size, especially helpful when you have multiple printers connected for different label formats.
Be sure to enter the exact dimensions of your labels so that the app can correctly match labels to the right printer.
Darkness Enhancement
Available options:
- 0 – lightest
- 1
- 2
- 3
- 4
- 5
- 6
- 7
- 8
- 9
- 10 – darkest
The darkness helps to enhance the quality of the print. The darkness can also be set as part of Label Magic.
Please select the option which corresponds to your chosen darkness settings.
DPI Settings
Available options:
- 203
- 300
The DPI refers to ‘dots per inch’ and it is a measure of the quality of the printer. The higher the value, the better quality the printer.
Please select the option which corresponds to your chosen printer.
Connecting and Managing Multiple Printers
Connect to multiple printers at once and manage each printer through separate tabs. Each printer tab allows you to set and save different label settings.

- Connect your first printer using the steps above.
- To add another printer, click the “+” icon at the top of the screen.
- Select the printer and model from the list like before.
- The app will then search for and connect to the additional printer.
- Once connected, switch between printer tabs to adjust settings for each printer.
How the App Chooses the Right Printer
When printing from Nutritics or Label Magic, the system will automatically send your label to the most suitable printer based on label size.
For example:
A Zebra printer set to 55 × 120 mm labels will receive labels of that size.
A Brother printer set to 80 × 150 mm labels will handle labels matching those dimensions.
It is crucial to ensure the ‘Media Size – Width’ and ‘Media Size – Height’ fields are correctly filled in with your printer’s corresponding label dimensions. These settings help the system identify which printer is best suited for each label. Please note, these fields do not change or resize the actual label layout, they are only used for printer identification
Apply Settings in Nutritics
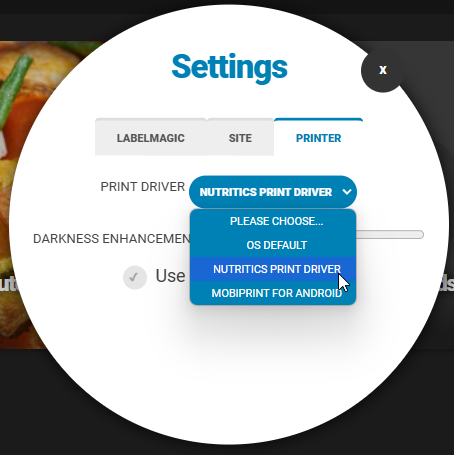
To print from Nutritics, please ensure that the Nutritics Print Driver has been selected as the ‘print driver’. The setting for this, depends on if you are printing from Label Magic or from the Orders Dashboard.
Label Magic Printing
If printing labels from Label Magic, you can configure Nutritics to print with the Nutritics Print Driver from within the Label Magic settings area:
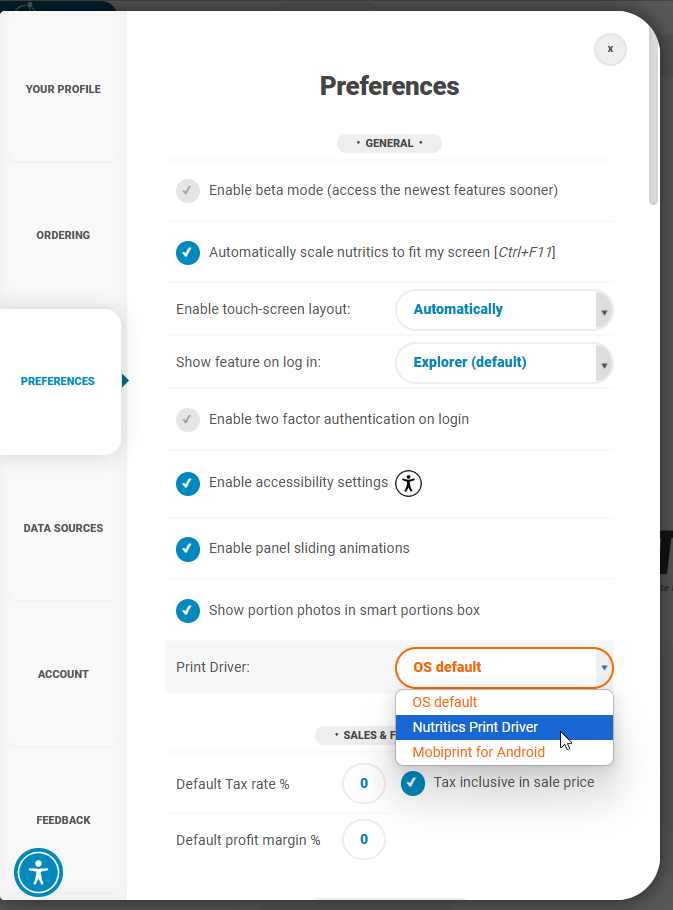
Orders Dashboard Printing
If printing dockets from the Orders dashboard, you can configure Nutritics to print with the Nutritics Print Driver from within the main settings area.
Please navigate to Settings > Preferences: