Brand Units are used as the vessel for publishing menus to an output. Within an organisation they may represent a physical brand, a concept, a specific output type or a group of sites that use similar menus, menu templates and/or output types. It’s possible that a Brand Unit may also be a single site that has significantly different menu content or design to others in an organisation. What the Brand Unit means to your organisation is decided early on, as part of the project when rolling out Ten Kites. Managing them going forward is an administrator responsibility, and often, copying the existing Brand Unit configuration is an easy path to follow when creating new Brand Units.
A Menu Group sits within a Brand Unit and these are used when much of the configuration for the parent Brand Unit is the same but there’s options to have different logos or disclaimers and where the menus differ from the parent Brand Unit but the output configurations do not.
Brand Units
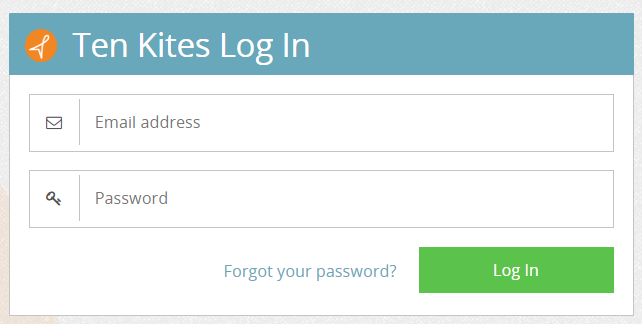
- Go to URL www.manage.tenkites.com
- Enter your Email address and Password> Log In
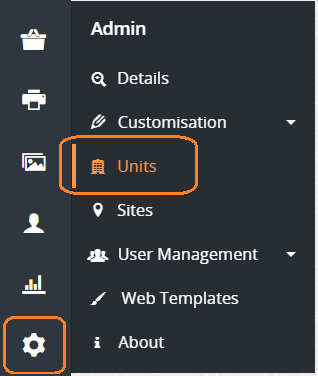
- From the home page navigation bar on the left side of your screen, select the Admin ‘cog’ icon > Units
- Your existing Brand Units will be displayed
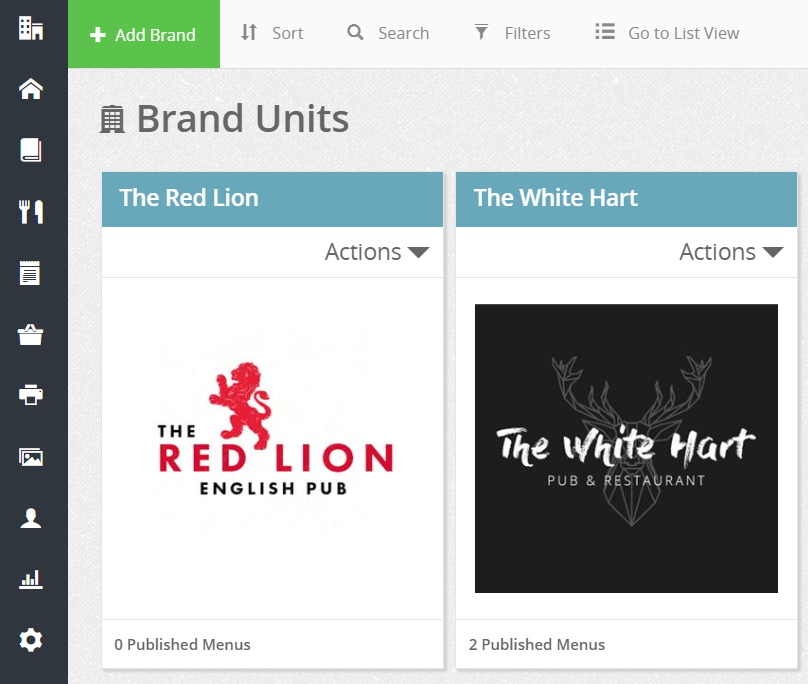
- Viewing options for this screen and Brand Units are:
- Sort alphabetically or by most recently created
- Use the ‘search’ function
- Filter to show Brand Units with published menus, without published menus or all
- ‘Gallery’ view (as screenshot above) or ‘List’ view of each Brand Unit by name
- To create a new Brand Unit select ‘+ Add Brand’ in the top left of the screen and you will see the ‘Details’ screen

- Unit Name: desired name of your Brand Unit
- Unit Short Name: automatically generated on creation of a Brand Unit and used within the Ten Kites API. Cannot be edited
- Unit Description: leave blank (TK admin use only)
- Unit Price Band: will default to the Standard but can select the price band applicable to this unit which updates all menus published within it
- Currency: will default to British Pound unless another option is selected
- Enabled: will always default to ‘YES’ on creation of a new Brand Unit. You can disable the Brand Unit should you wish to temporarily stop using a particular unit
- Logo: choose your brand logo image from your ‘Media Manager’ library or desktop
Outputs need to be added to your Brand Unit for each different output type-e.g. menus to web, allergens on tablets etc. These need to be switched on in Output Settings first before they are available as an option.
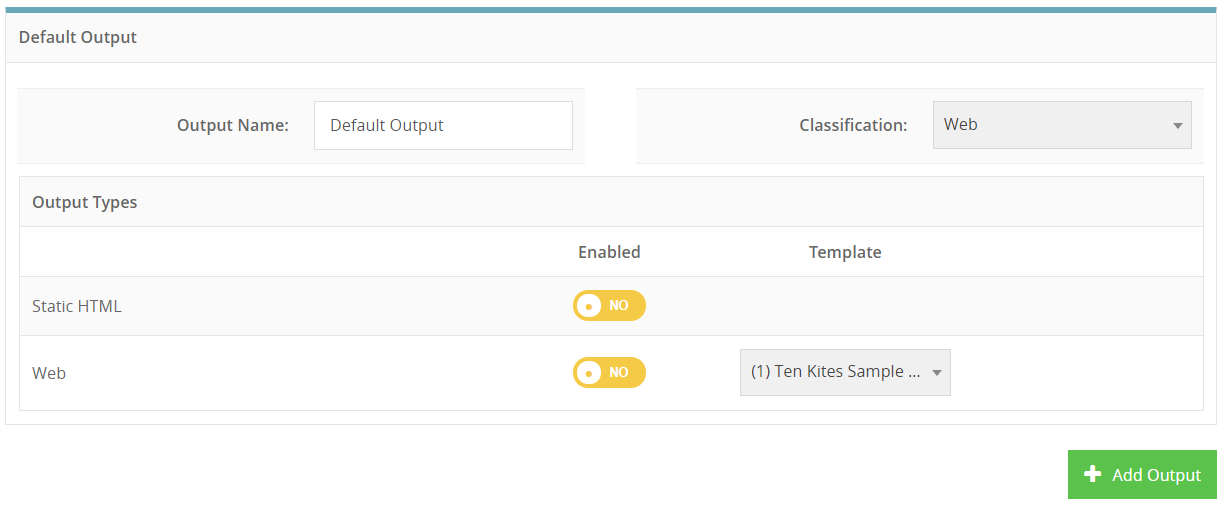
- Output Name: Can be whatever you deem appropriate for identification when ready to publish but should be easily understood by whoever will publish recipes, e.g. Allergens on Tablets
- Classification: Web (default)
- Output Type-
- Static HTML: overnight file transfer to POS (if available to your organisation)
- Web: your data file to be transferred to any output of your choosing configured to your organisation e.g. website)
- Template: will either be a standard Ten Kites template or a bespoke template designed for your organisation
- Enable each output type for Static HTML and/or Web as you create them and they will be available to publish to once the Brand Unit is active.
If in doubt, review the settings for Brand Units originally created during your Ten Kites implementation and mirror those as applicable
- You can create as many additional outputs as required using the ‘+ Add Output’ button however, note that a maximum of three output types are allowed per Brand Unit. For example, your Brand Unit output types are menus to web, allergens on tablets and digital recipe cards.
You can have 2 outputs for menus to web template, one for food, one for beverage and the same again for allergens and recipe cards. In total, there might be 6 outputs added to the Brand Unit. Within the ‘Output Settings’ tab, the appropriate web templates for this unit can be selected via the drop-down options
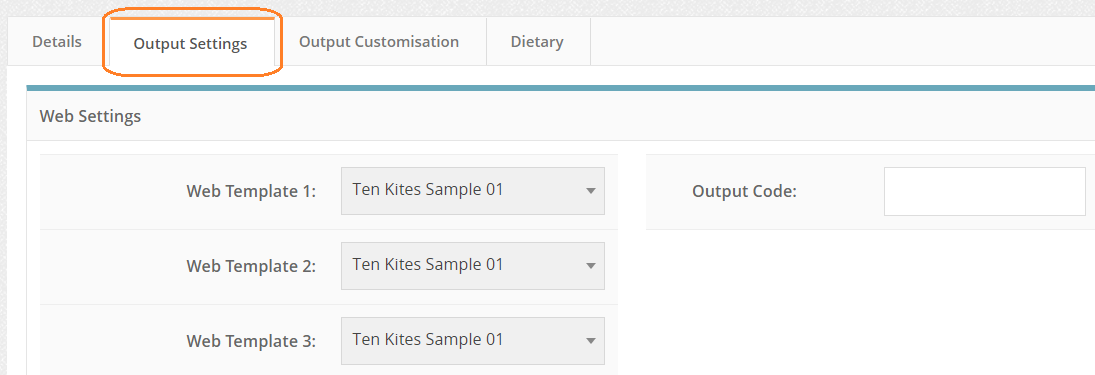
The Web templates available have been assigned to your organisation based on agreed designs and features for your company. Depending on the complexity of requirements you will have between 1-3 templates available for selection.
Output codes are used to create the URL of each output web page. If not specified, an output code will be automatically generated for this unit. Where multiple outputs are created for a unit the following convention is applied for each URL (and so on for each output type): –
- Output 1 = /
- Output 2 = /02
- Output 3 = /03
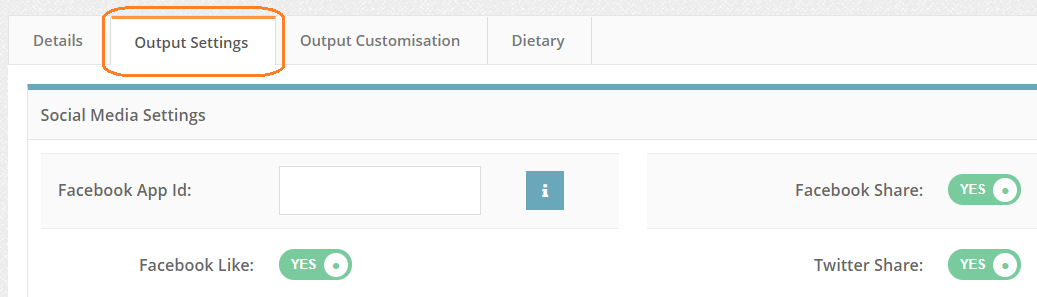
Facebook preferences can also be enabled to link your outputs to social media.
NB: Ten Kites Facebook App will be used if no customer ID is entered.
Still within the ‘Output Settings’ tab, are the ‘Displayed Output Values’ which will be displayed as below by default on the creation of a new unit and determine what features are displayed for each output.
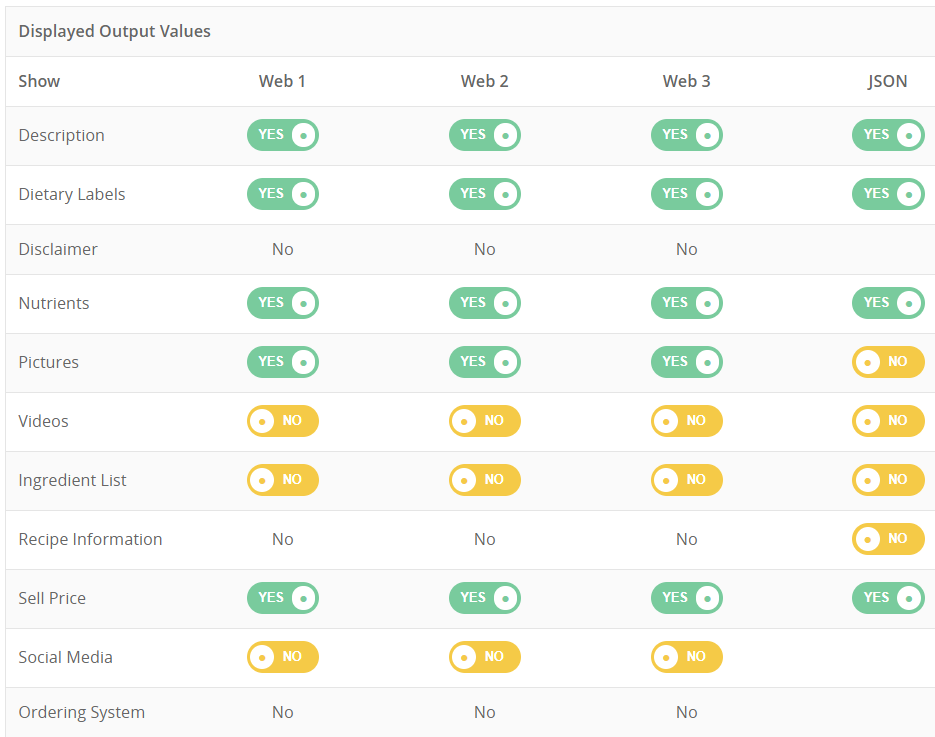
If creating a new unit and unsure of which settings to select, open an existing unit and use it as the template to correctly configure and mirror the options.
- Within the ‘Output Customisation’ tab you can add text and links to the page title, header, footer, banner and disclaimer (depending on the configuration of your web template)
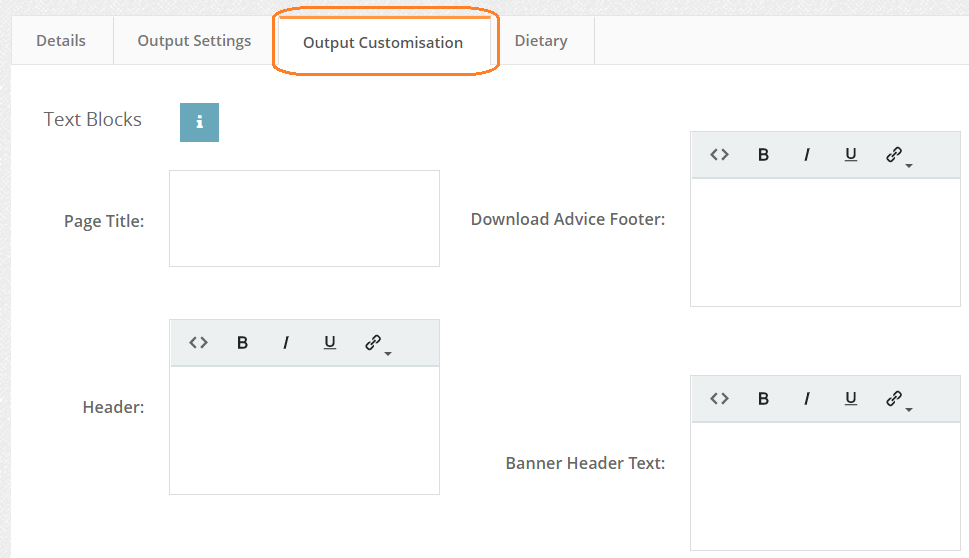
Images can also be added for headers and footers compatible with large screens, desktops, tablets and smartphones (again, depending on the configuration of your web template).
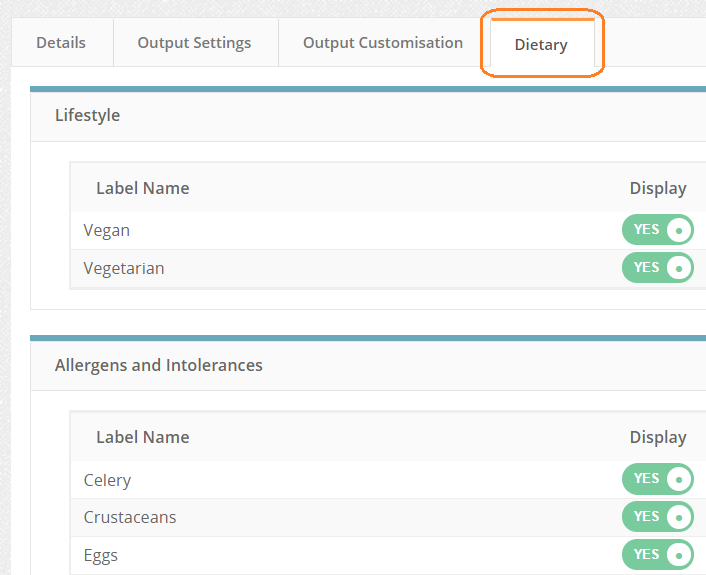
- Within the ‘Dietary’ tab, you can determine which information is displayed from the lifestyle, nutritional, allergens and intolerances options.
Note: If an Allergen or Intolerance field are set to Yes for display but the data for that field is missing from the Menu Items, then the system will display any unknowns as YES on the output.
- Review all the information entered within the four tabs (details, output settings, output customization and dietary) and click ‘Save Brand’ in the top left of the screen.
- To check the outputs, go to ‘Publish’ on the left-hand navigation bar and publish a menu to each output type to verify the format and adjust settings if required.
Note: It will take a few minutes for the web outputs to show for the first time as a new web link is also being created.
Users with Admin access will see the new Brand Unit by default. Assign any other users that need access to the Brand Unit and link any Menus that need to be published to that unit.
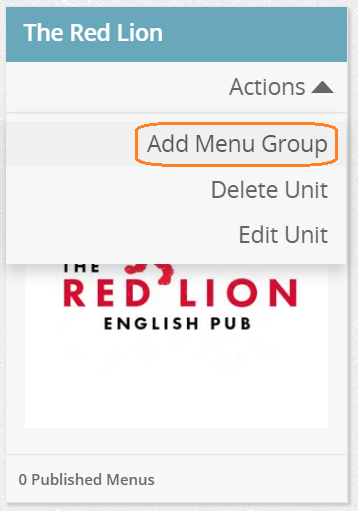
Menu Groups
- To create a Menu Group within a Brand Unit, go to Admin> Units> select the Brand Unit> Actions> Add Menu Group
You will see a message advising that this Menu Group is linked to the Brand Unit and most fields will be populated as per the parent unit
The only editable fields for a Menu Group are as follows:
- Unit Name
- Unit Logo
- Price Band
- Currency
- Output Code
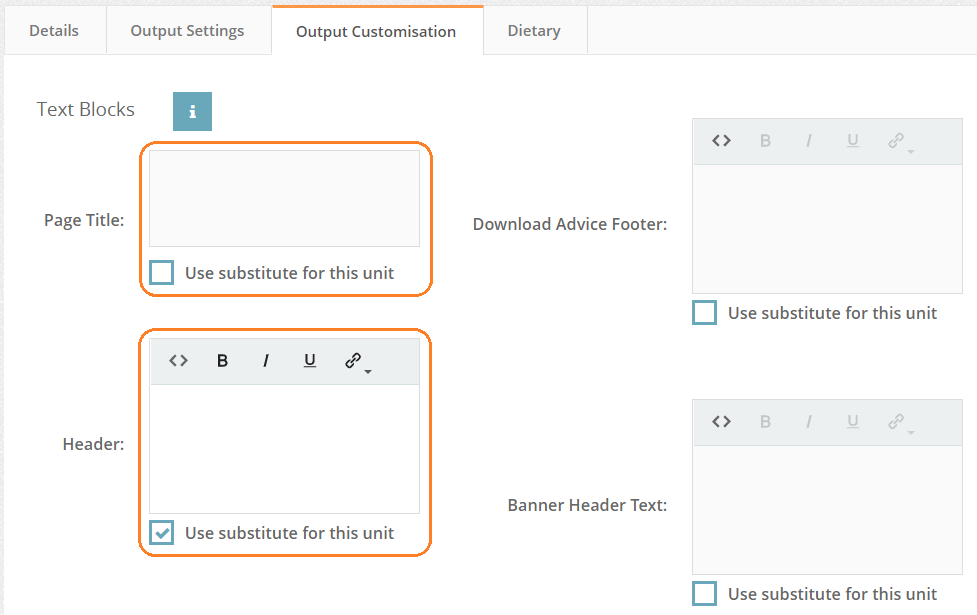
- All fields in Output Customisation

Add the Menu Group name and all other information applicable to this group. For changes to ‘Output Customisation’ you will see that all boxes are greyed out and unable to be edited until you tick the ‘Use substitute for this unit’ box.
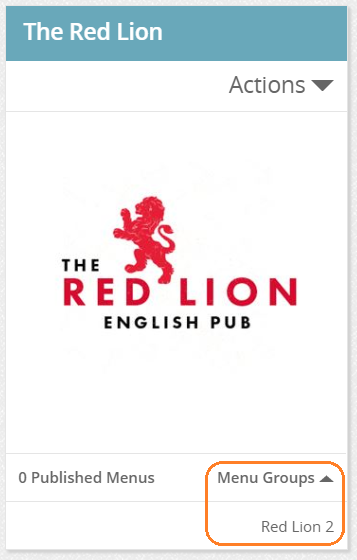
Once you have made any required changes, ‘Save Menu Group’ in the top left corner of your screen and the new unit can be found within the Brand Unit> Menu Group> select from drop down options
NB: For consistency and ease, all future changes made at Brand Unit level will apply to Menu Groups unless manually amended as required.
Users with Admin access will see the new Menu Group by default. Assign any other users that need access to it and link any menus that need to be published to that unit.