Within Ten Kites you can create menus (or amend menus imported from your recipe management system) to be published to various outputs such as your website, kitchen management system, POS system and more.
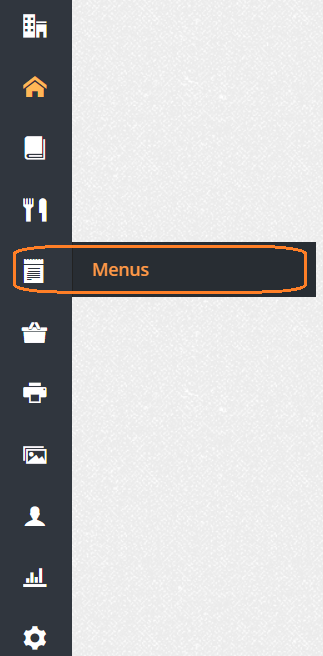
From the home page navigation bar on the left side of your screen, select the ‘Menu’ icon:
From the Menu home page, you can:
- Add a new menu
- Sort menus alphabetically or by most recently updated/created
- Use the ‘search’ function
- Filter to show menus that are published/unpublished, created within Ten Kites/imported, linked/unlinked, assigned by brand unit
- Use ‘Gallery’ or ‘List’ view of each menu by name
- Show or hide images assigned to a menu
- Manage (delete) unlinked menus. See a guide on this here.

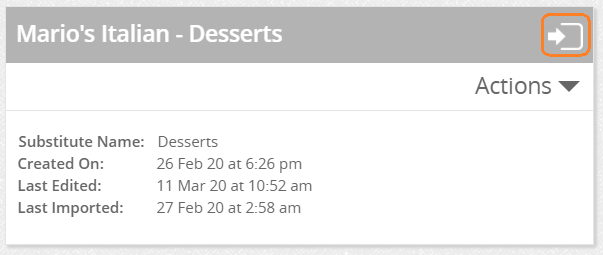
Any menus imported from your recipe management system will be displayed on the menu home page with a grey name banner (menus created directly within Ten Kites will have a blue banner), an arrow icon in the top right hand corner and the date and time last imported. Examples below, in gallery view and list view:

Menus imported from your recipe management system cannot be edited except for the substitute name, description and sell price. An imported menu can be used as it is or can easily be copied with a couple of clicks on the Menu> Actions> Copy Menu and given a new name to differentiate from the imported menu.
All fields and menu items can be edited as required on your copied menu:

New menus and menu items are imported once a day from your source system into Ten Kites. Any changes made to existing menus/menu items within your source system before the cut off will automatically be updated within Ten Kites ensuring your organisation is always up to date.
Note: For published menus, the changes will automatically update to all output types, ensuring the menu items and menus are up to date/ There is a permission that requires an approval of the update that can be enabled if required.
For copied menus, please note that the copy does not update its recipe items content or section layout based on any changes to the parent.
Creating New Menus
To create a new menu, click on ‘+ Add New Menu’ top left of the menu home screen.
If templates have been added to your Ten Kites organisation you will be able to select them from a drop-down list. If no templates have been added or you select ‘Blank Menu’, you will be presented with the below screen containing 4 tabs:

Within the ‘Details’ tab you need to assign a name which will identify this menu within the organisation. If you wish to assign an alternative customer/web friendly name, click on the ‘+’ and enter a substitute name.
Menu Code can be used to search for a menu instead of the menu name
Description, Sub-Heading 1 and Sub-Heading 2 can be used to enter additional information that will be displayed on your outputs such as offers, dates of seasonal menus or days/times available
Sell Price can be entered for set menus and will be displayed on your selected output
Type can be selected from:
- Standard: ability to create as many courses and add as many menu items as you wish
- Template- fixed content: the content of the menu can be created and locked to minimise changes but to allow a degree of flexibility for some users when making amendments to menu items, for example to adhere to brand standards
- Template- flexible content: for use in conjunction with the Ten Kites Print module
Ten Kites also has the flexibility to assign different themes to templates i.e. colours to match the brand or concept and are configured within the brand unit (if enabled for your organisation)
The ‘Content Builder’ tab is where you build and edit the content of your menu that will be displayed on your outputs, such as a web page. There are 4 main design elements that can be formatted in any order and repetition of your choosing: –
Section: a course, i.e. starters, or group of menu items, e.g. burgers
Info: can be used for customer engagement, marketing messages or promotional offers
Build Your Own: where multiple options exist for a dish,e.g. toppings for burgers
Menu Item: the meals, side dishes, drinks, etc. you wish to add to your menu
Free type the name of your first section in the text box (the ‘x’ deletes all text within that box)

Press return/enter on your keyboard to create the next row of your menu. Within a section, this will always default to menu item. To select a different row type, click on the knife and fork icon (highlighted below in purple) and choose an alternative.
To add a row above the top row of any menu click on the ‘+’ (below in orange) otherwise clicking on the ‘+’ icon at the end of any line (below in yellow) will insert a new row directly underneath

To add menu items to your menu, start typing the name of an item and a list of all matching menu items (imported from your recipe management system or created in Ten Kites) will be displayed:

Select the correct item and press return/enter on your keyboard to create the next line and repeat the above until you have added all your menu items to a section.
It is a good idea to save your menu periodically so as not to risk losing any changes should your internet connection be interrupted. There are a maximum 250 menu items allowed to be added to a menu item.
Once created, you can move, edit (‘cog’ icon) or delete (‘x’) any row (below in orange)

To move a row or section, simply click on the row, drag up or down and drop into position.
NB: If you move or delete a (green) section row, all menu items within that section will also be moved/deleted.
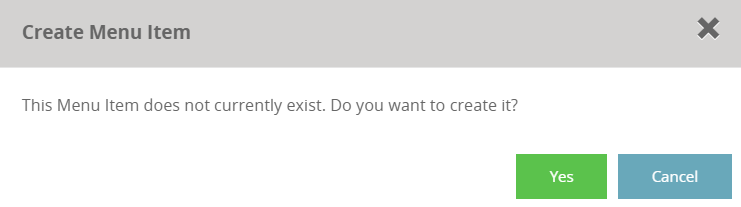
If a menu item doesn’t appear when you type the name, you have the option to create manually. You will need to click on the cog icon to enter all the information relevant to the menu item.
Updating Menus After Recipe Changes
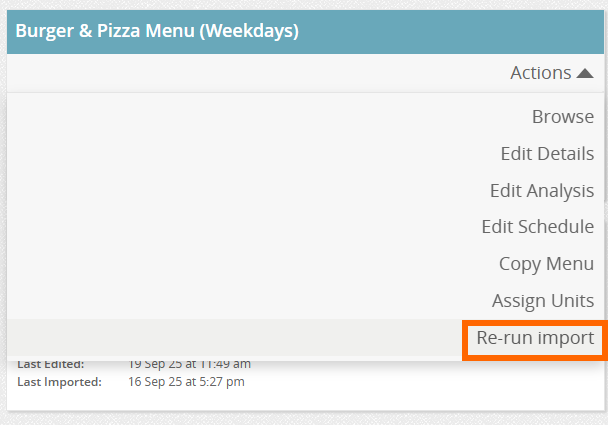
If you’ve updated a recipe in your recipe management system and want those changes reflected on menus, you can use the ‘Re-run Import’ button on each menu.
- This option is best for small updates (around 1–3 menus) where you know exactly which menus contain the updated recipe.
- For larger updates, or if you’re unsure which menus are affected, we recommend waiting for the overnight sync, which automatically updates all menus.
To do this, navigate to your menu and click the ‘Actions’ dropdown and click ‘Re-run Import’:
The menu will now be queued for updating. The length of time it takes to complete will depend on the changes/size of the menu. You can keep an eye on this progress from Settings > Import Queue.